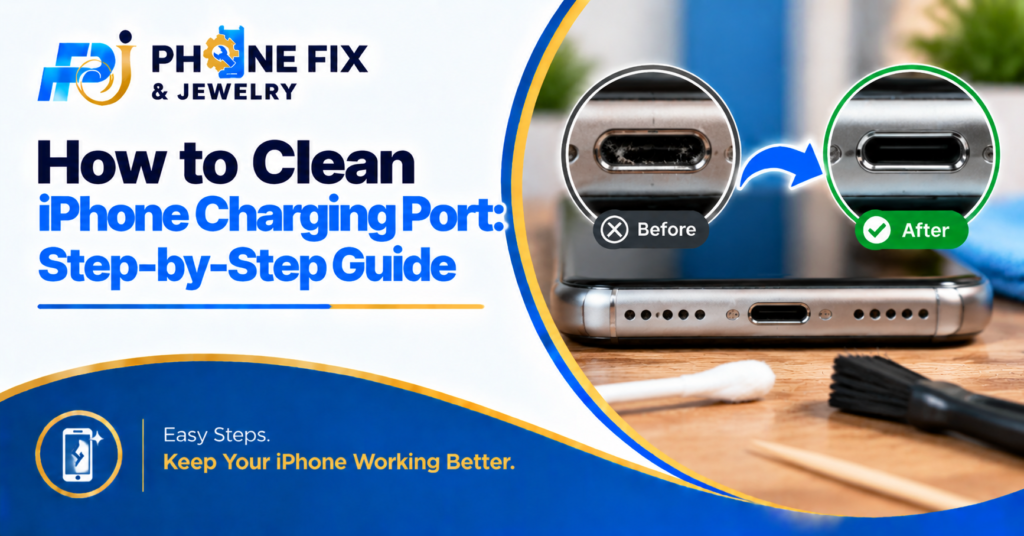
Cleaning your iPhone’s charging port is essential for maintaining its performance. A dirty port can lead to poor charging and connectivity issues.
In this guide, you will learn how to clean your iPhone charging port effectively and safely. We’ll cover the tools you need and the step-by-step process for cleaning out your iPhone charging port. Whether you’re looking for an iPhone charging port cleaning kit or simply want to do it yourself, we’ve got you covered.
How to Clean iPhone Charging Port Safely at Home
The safest answer to how to clean an iPhone charging port is to remove loose lint gently, not scrape the port like you’re digging grout from tile. Use a flashlight, a wooden or plastic toothpick, and patience. Keep the phone powered off, keep liquids away from the opening,g and don’t use anything sharp enough to bend pins or scratch the inner contact area.
I’ll take a clear side here: most people get into trouble because they rush. The goal isn’t to make the port look spotless under a microscope. The goal is to clear enough packed dust so the cable clicks in straight and charges steadily.
Why Charging Ports Get Clogged
Your iPhone spends a lot of time in pockets, bags, cup holders, gym pouches,es and dusty work areas. Every time you plug in a cable, tiny fibers can get pressed deeper into the port. Over time, that lint can form a firm little pad at the back of the opening.
That’s why a bad charging port often isn’t bad at all. The cable may wobble, charge only at a certain angle,gle or fail to connect because debris is blocking the plug from sitting fully inside. iFixit’s Lightning port guide also focuses on loosening debris, checking whether the charger seats fully, and testing charging afterward.
USB-C iPhones need the same cautious thinking, but I’d be even more careful with them. The center tongue inside a USB-C port is easy to bump if you jab blindly. For Lightning ports, there’s a bit more open space, but that doesn’t make rough cleaning smart.
What Should You Use Before You Start?
Use fewer tools than you think. A lot of online advice makes this job sound like you need a tiny repair lab. You don’t. For basic iPhone port cleaning, simple dry tools are usually enough.
Good options include:
- A bright flashlight to inspect the port before and after cleaning the charging port work
- A wooden toothpick or soft plastic pick for carefully cleaning out iPhone charging port debris
- A soft, dry, lint-free cloth for the cable end and outside edges
- A clean, soft brush for dust near the opening, not deep scraping
- An iPhone charging port cleaning kit only if it uses non-metal tools and soft brushes
Skip these:
- Metal pins, needles, staples, SIM tools, or paper clips
- Water, household cleaners, or wet cotton swabs
- Thick cotton buds that can leave fibers behind
- Aggressive compressed air blasts, especially close to the port
- Charging while the port may still be damp
Some guides recommend air, and some repair people use it carefully. I don’t like recommending it as the main home method because it can push debris deeper or introduce moisture if the can spurts. Apple support material has also advised against compressed air for iPhone cleaning, so dry, controlled removal is the better default.
Step-By-Step Cleaning Process
Here’s how to clean an iPhone charging port without turning a small lint problem into a real repair.
- Power off the iPhone. Don’t clean the port while the phone is charging. Unplug the cable, shut the phone down, and give yourself good light. If the phone recently got wet, stop and let a technician look at it.
- Inspect before touching anything. Tilt the phone so light reaches the back of the port. You’re looking for packed lint, crumbs, dust,t or discoloration. Green, white,te or crusty buildup is a warning sign, not a cleaning challenge.
- Loosen debris gently. Use a wooden or plastic toothpick and work along the inside edges with very light pressure. Don’t stab the back wall. Don’t drag hard across the contact area. If you feel resistance, back off.
- Pull debris outward. The move that works is a tiny hook-and-lift motion. Loosen the lint, then pull it toward the opening. Wipe the tool clean and repeat. It’s boring, but boring is good here.
- Brush the opening. Use a soft, dry brush around the outside of the port to remove loose dust. Don’t shove bristles deep into the connector.
- Clean the cable end. A dirty cable can make a clean port act dirty. Wipe the connector with a dry lint-free cloth and check for bent, blackened,d or damaged ends.
- Test with a known-good charger. Plug the cable in straight. It should seat more firmly. If the phone still won’t charge, test another cable and adapter before blaming the port.
This is the part most people skip: test methodically. If three cables fail after careful cleaning, the issue may be the port, battery, charging circuit, cable, adapter,er or software behavior. Guessing gets expensive.
Common Mistakes That Damage Ports
The worst mistake is using metal. A needle might look perfect because it’s thin, but it can scratch contacts, bend small parts,rts or short something if the phone isn’t fully powered down. I know people use them anyway. I still wouldn’t.
The second mistake is using liquid because the debris looks “stuck.” Unless you know exactly what you’re doing, don’t drip alcohol into the port. Liquid can travel where you don’t expect,pect and corrosion can make things worse later.
The third mistake is forcing the cable after cleaning. Apple specifically warns not to force connectors into ports because excessive pressure can cause damage. If the cable won’t seat after gentle cleaning, that’s your sign to stop, not push harder. (support.apple.com)
When Home Cleaning Isn’t Enough
A basic lint clog should improve quickly. If you spend more than 10 or 15 minutes and nothing changes, I’d stop. More effort doesn’t always mean better results; sometimes it just means more risk.
Get help if you notice:
- The cable feels loose even after cleaning
- Charging starts and stops when the phone moves
- The port looks bent, burned, green, or crusty
- The phone shows liquid warnings
- More than one reliable cable fails
- The phone charges wirelessly but not by cable
Asurion also notes that visible green buildup around a charging port is a reason to get professional help rather than keep poking around. That’s sensible advice. Corrosion isn’t pocket lint,t and treating it like lint can make a repair harder. (asurion.com)
How Phone Fix & Jewelry Can Help
Phone Fix & Jewelry can help when careful cleaning doesn’t fix the issue or when you’d rather not risk damaging the port. Their team handles phone repair needs such as charging problems, port checks, cleaning,ng and part-related diagnostics, while also supporting customers with clear explanations before work begins.
That matters because a phone that won’t charge isn’t always suffering from one obvious problem; it could be debris, a worn cable, a damaged connector, or another internal fault. A good repair visit should narrow that down instead of guessing.
The value here is practical expertise, steady customer support, and a result you can test before you leave. If your iPhone still won’t charge after you try cleaning the iPhone charging port, reach out through the Phone Fix & Jewelry contact page.
Wrapping It Up
Learning how to clean an iPhone charging port is worth doing, but only if you treat the port like a delicate connector, not a junk drawer. Use dry tools, stay away from metal and liquid, and stop when the signs point to damage instead of lint. If cleaning works, great. If it doesn’t, don’t keep digging; get the port checked before a cheap problem becomes a real repair.
Frequently Asked Questions:
Can I Use a Toothpick to Clean My iPhone Charging Port?
Yes, a wooden or soft plastic toothpick can work if you use very light pressure and avoid scraping the contacts. It’s one of the safer home tools because it’s non-metal, but it can still cause damage if you force it. Use it to lift lint outward, not dig aggressively.
Is Compressed Air Safe for iPhone Port Cleaning?
I wouldn’t use compressed air as the first choice. A short, careful puff may help in some situations, but strong blasts can push debris deeper, and some cans release moisture. Dry manual cleaning gives you more control.
How Often Should I Clean The Charging Port?
Clean it only when you notice symptoms such as loose cable fit, slow or inconsistent charging, or visible lint. Routine deep cleaning isn’t necessary for most people. A quick outside brush and keeping dusty pockets clean is usually enough.
What If My iPhone Still Won’t Charge After Cleaning?
Try another cable and power adapter first. If the problem continues, the port may be worn, damaged, corroded, or affected by another internal issue. That’s when a repair shop diagnosis makes more sense than repeated cleaning.
What Is The Safest Way To Learn How To Clean iPhone Charging Port?
The safest way to learn how to clean an iPhone charging port is to follow a dry, gentle process: power off the phone, inspect with light, use a non-metal tool, pull lint outward, and stop if you see damage or corrosion. Don’t force the cable afterward.